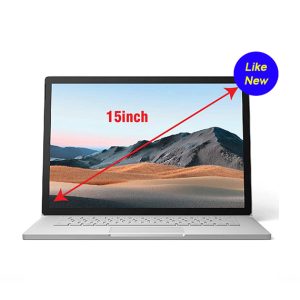
Thông tin Sale hội trăng rằm, Giá luôn rẻ - Giảm đến 15 triệu MUA NGAY


I’ve been there—you’re right in the middle of an important project, and suddenly, your screen freezes. Or worse, you’re greeted by the dreaded Blue Screen of Death. It’s a moment of pure panic. As someone who lives and breathes tech at Surface Plus, I can tell you that performing a recovery surface pro might sound like a nightmare, but it is actually one of the most empowering skills you can learn as a Surface owner. Whether your device is lagging, stuck in a boot loop, or you just want that “new computer” feel again, a clean recovery is often the best medicine.
In this blog, I’m going to walk you through everything I’ve learned about restoring these beautiful machines. We’ll cover why you might need a recovery, the different methods available, and a step-by-step guide to getting your Surface Pro back to peak performance. Let’s dive in!

When Do You Actually Need a Recovery Surface Pro?
Before we jump into the “how,” let’s talk about the “why.” Not every glitch requires a full system wipe. However, there are specific scenarios where a recovery surface pro is the only real solution. Usually, we see customers come into our store when their surface pro bị lỗi (Surface Pro is experiencing errors) that standard restarts just won’t fix.
If you notice your device is significantly slower than it used to be, or if you’re constantly running out of space and suspect system files are bloated, a recovery can clear out the junk. It’s also the first step we recommend when a surface bị lỗi driver (Surface has driver errors) which can lead to touch screen failure or Wi-Fi connectivity issues. Finally, if you’re planning to sell your device, a factory recovery is essential to ensure your personal data is completely erased.
Method 1: The Built-in Reset (The Easy Way)
If your Surface Pro still boots into Windows, you’re in luck. You can use the built-in “Reset this PC” feature. This is the least technical way to approach a recovery surface pro. You have the option to keep your files or remove everything. Personally, if I’m doing a recovery because of performance issues, I always choose “Remove everything.” It’s the only way to be sure you’re starting with a truly clean slate.
Go to Settings > System > Recovery and select Reset PC. From here, Windows will ask if you want to download the OS from the cloud or reinstall locally. I usually recommend the cloud download; it ensures you get the latest, most stable version of Windows 10 or 11 direct from Microsoft, avoiding any corrupted local files that might have caused the issue in the first place.
Method 2: The Step-by-Step Guide to a Recovery Surface Pro via USB
Sometimes, the built-in methods aren’t enough. If your device won’t boot at all, you’ll need to use a dedicated recovery image. This is a bit more involved, but it is the definitive way to fix a stubborn machine. This is exactly what we do when a surface cần cài lại win (Surface needs Windows reinstalled).

First, you’ll need a working PC and a USB drive with at least 16GB of space. You’ll need to visit the Microsoft Official Support page to download the specific recovery image for your Surface Pro model. You will need your serial number, which is usually found under the kickstand.
Featured Snippet: How to boot your Surface Pro from a recovery USB drive?
- Shut down your Surface Pro completely.
- Insert the bootable recovery USB drive into the USB port.
- Press and hold the Volume Down (-) button.
- While holding Volume Down, press and release the Power button.
- When the Microsoft or Surface logo appears, release the Volume Down button.
- Select your language and keyboard layout to enter the Recovery Environment.
The Importance of the Recovery Image
Why use a specific Surface recovery image instead of a standard Windows 11 installer? This is a question I get asked a lot at Surface Plus. The reason is simple: drivers. Surface devices have specialized hardware—from the custom touch controllers to the specialized power management systems. A standard Windows installer might leave you with a device that works but lacks touch support or has terrible battery life. A true recovery surface pro image includes all these specific drivers out of the box, ensuring the hardware and software work in perfect harmony.

Troubleshooting During Your Recovery Surface Pro Process
Even with the best instructions, things can go sideways. One common issue is BitLocker. If you have encryption turned on, Windows might ask for your BitLocker recovery key. If you don’t have this, you might have to wipe the entire drive and lose your data. I always tell my friends: back up your key to your Microsoft account today! Don’t wait for the disaster to happen.
Another common hurdle is the USB drive not booting. If your device skips the USB and goes straight to the “Automatic Repair” screen or the Windows logo, you may need to check your UEFI settings. To enter UEFI, hold the Volume Up (+) button while pressing power. Ensure that “USB Storage” is at the top of the boot configuration list. This ensures the hardware looks at your recovery drive before trying to boot from the internal SSD.
Pro Tips for a Successful Restore
In my experience, the biggest mistake people make during a recovery surface pro is not having their device plugged into power. A recovery process can be intensive and take anywhere from 30 minutes to over an hour. If your battery dies halfway through, you could end up with a “bricked” device that requires professional hardware repair. Always keep that magnetic Surface Connect charger firmly attached.
Also, once the recovery is finished, don’t stop there. Immediately go to Settings > Windows Update and check for updates. Even with a fresh recovery image, there are likely firmware updates and security patches released since that image was created. Keeping your firmware updated is the best way to prevent future crashes.

Conclusion: A Fresh Start for Your Surface
Performing a recovery surface pro is like giving your device a second lease on life. It clears out the digital cobwebs, fixes deep-seated software errors, and restores that snappy responsiveness we all love about the Surface line. While it might seem intimidating the first time you do it, following these steps will help you navigate the process with confidence.
If you’ve tried these steps and your Surface is still acting up, or if you’re uncomfortable performing these technical tasks yourself, don’t worry. At Surface Plus, we specialize in everything Surface. Whether you’re in Hanoi and need a quick diagnostic or looking for an affordable upgrade, we’re here to help. Sometimes, a software recovery is all you need, but other times, a little expert TLC goes a long way. Happy computing!